You’ve probably heard of Google Web Designer and wondered how it works. The good news is that Google Web Designer is incredibly easy to use. If you don’t have a prior knowledge of HTML, CSS, or web design, you can quickly learn all you need to know by reading the extensive documentation. Here are a few tips to get you started. Read on for an overview of the various features of Google Web Designer. Then, move on to other areas of this program.
Features of Google Web Designer
The Google Web Designer is a free application for designing, modifying, and publishing websites. With the advanced animation creating mode, you can create animated content using keyframes and modify transition times and easing. You can also use the fluid layout tool to adjust your container’s size and maintain the layout of your design. The program also includes an event system and a set of customizable actions that will enable you to create high-quality documents. With this software, you can also edit the text and font settings as well as style sheets.
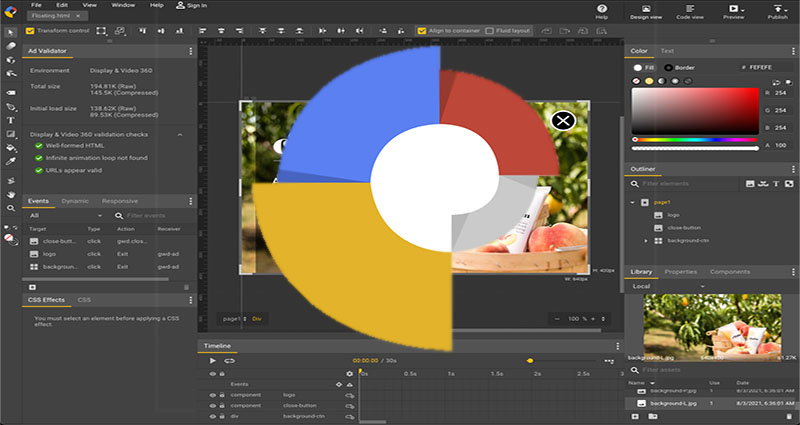
Design view
A visual interface, also known as a “Design view”, of Google Web Designer is a powerful tool for designing web content. You can create CSS, HTML, and JavaScript using a wide variety of tools, including syntax highlighting, code autocompletion, and a library of components. Using this tool is both intuitive and fast, so you’ll quickly be able to design your website. The Code view enables you to make changes to the HTML and CSS file without leaving the design view.
Code view
When you’re using Google Web Designer to create HTML5 banners, you can use the Code view to see how each element is coded. For example, if you’re working on a Google Maps site, you can use the Code view to see how each of the elements is styled. The HTML5 Studio automatically adds the necessary scripts and applies the Global ClickTAG. Before implementing the Global ClickTAG, you should test it on various mobile devices and read the documentation.
Events
In Google Web Designer, you can easily set up custom events to trigger when a visitor views a certain page. In the events dialog, click the Add button. Type the URL for page1_1 or page2 and click OK. This will open the Events dialog where you can specify the transition type, duration, and other event settings. Once you’ve created a new event, you can edit its settings and customize its name. You can also customize your event marker by changing its settings, such as going back to the previous page.
Animations view
To create an animation, you need to add keyframes to your timeline. These keyframes indicate the start and end positions of an element in the animation. You can also set the duration of the animation using a span, which is how long you want the animation to run. The shorter the span, the faster the animation will play. Easings can also change the speed and acceleration of the transitions. With Google Web Designer, you can even add different types of animations to different parts of your site.
HTML5 support
With HTML5 support in Google Web Designer, you can build and publish full-scale HTML5 webpages. The software is extremely easy to use and features pre-built components for CSS3, 3D animation, and JSON. You can also use the tool to create web content in other popular formats such as PDFs and DOCs. This article explores the pros and cons of HTML5 support in Google Web Designer. It’s worth considering the tool if you’re a designer.
